
A 550 Spyder Repro
As Told by Joe Schneider
I’ve been a petrol head since I was a kid, having owned Porsches since I got my drivers license (a ‘70 914 which unfortunately quickly succumbed to longitudinal rot). My dad had many collector cars ranging from vintage Mercedes, Jaguars, and Porsches. I’ve been attending concours and vintage-car events for a few decades now, so I can say I am a bit of a petrol head.
Over the years I’ve owned many Porsches (another 914, a few 944s and a few 911s with a 997 Targa 4 in my collection along with my wife’s daily driver being a Cayenne S). I’ve started building a second collection which will be comprised of only Porsches (the first group of cars was sold off several years ago—a long story for another time).
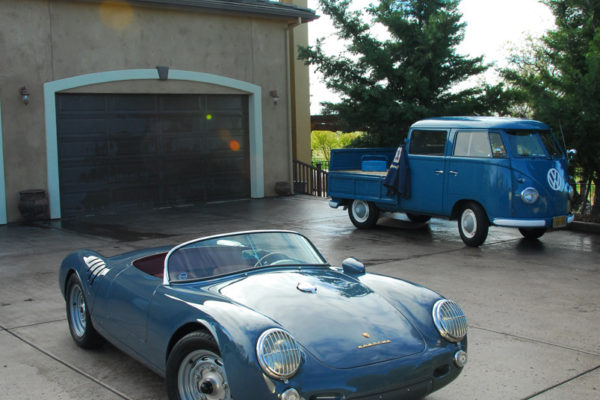
A couple of years ago I was in my friend’s garage talking cars. He is an avid VW collector (and the owner of the ‘56 Binz shown here in the background, next to the garage door) and he had me drive his all original ‘53 convertible to a local car show (he was driving his restored ‘53 23-window Deluxe). A beautiful day and driving that vintage convertible caused me to want a cool vintage car. It was in the garage that afternoon that the story of SM 0003 (Seduction Motorsports’ chassis number) began as plan was hatched to have a bespoke 550 Spyder replica built.
I looked at several other kit cars but felt they simply were a shadow of the original car (often times finished with modern carpeted floors and simple non-period bucket seats). I kept looking and found a 550 Spyder group on Facebook and started asking people about who the best builders were out there. Daniel Verwers of Seduction Motorsports replied to my post and we started exploring to have him build me a car to my specifications.
At that time Daniel had just started Seduction Motorsports and had built one car to launch his company (a beautiful Outlaw Spyder). He had started building another car for a wealthy customer from the Middle East, but that project had coasted to a stop at that point.
After a period of vetting Daniel and his startup company (which really was Daniel building cars in his garage), I commissioned the car to be built October 24th, 2013. It was a big leap of faith. To put that decision in perspective, I didn't actually meet Daniel face to face till he personally delivered the car to my home that following February.
Having been in the collector-car hobby for decades and having friends who have series collections, the importance of a well-documented history for the car is key. I treated the building of this repro no differently, with the exception of deciding to document the cars entire life (including the build process) on Facebook (https://www.facebook.com/SM550003). The car's history is available there and the car currently has almost 2,500 followers on Facebook.
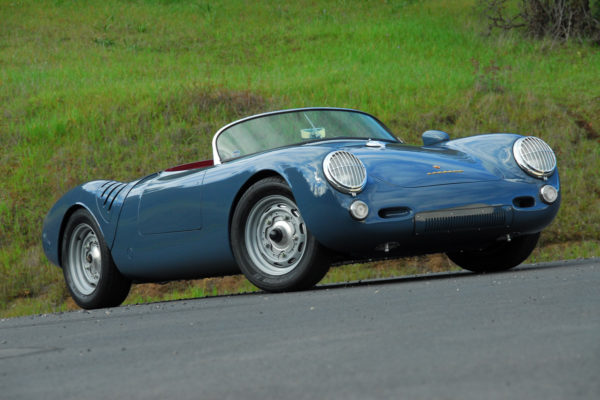
My goal for the car was simply this: to have a faithful repro of a period road-going 1955 550 Spyder. The early part of the build involved having the chassis and body fabricated and bonded so this gave me some time to figure out how the car would be finished. For me that was to source a period-correct Porsche color.
This preference involved contacting Willhoit Restorations in Long Beach, CA. Willhoit is known for early Porsche 356 restorations and maintains an accurate catalog of correct Porsche colors through the entire production life of the 356.
I knew I wanted a dark red interior (Oxblood red has always been a favorite of mine for vintage hot rods) and I’ve seen this deep red as a standard finish in Porsches from that era. The challenge was to find a color that was vintage.
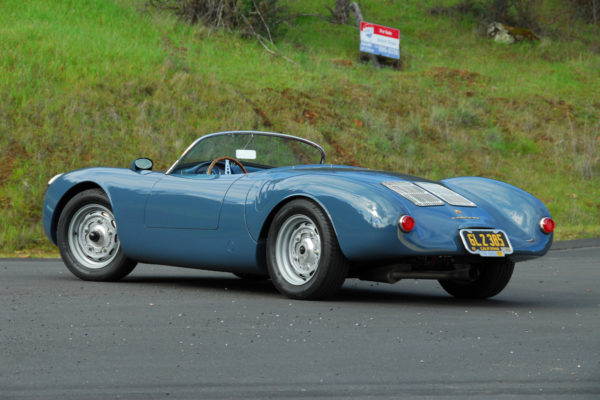
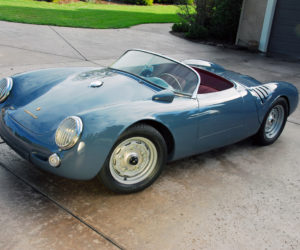
The one thing I knew was that I did not want a metallic color (though Porsche offered a handful of metallic and semi-metallic colors at the time). After almost two weeks of walking around with handful of spray out samples from Willhoit, I settled on Porsche #5707 Aquamarinblau (Aquamarine Blue).
I also made the decision to follow Porsche’s theme of lightening the 550 by drilling holes wherever they could without compromising the car’s integrity. These lightening holes are something of a theme with racing Porsches and is a strategy the factory pursued throughout its early racing history. This “lightening hole” theme can be found throughout the car today.
Back in the day, owners often swapped out the stock “banjo” 356 steering wheel because it would flex under load (almost all Spyders purchased in the day wound up at local track events and were campaigned across multiple continents). I knew that they usually chose Nardi wood-rimmed steering wheels and this is what is often fitted to replicas today.
I wanted to go another route for two reasons. The first was I found through my research that another popular wheel swap was the Moto-Lita steering wheel sourced out of England. The company still exists today and I selected its Mark 3 laminate-wood riveted rim wheel that featured holes along the spokes. This wheel looks great against the period-correct replica gauges mounted in the dash (I even went so far as to understand the button placement by researching early cars).
I also wanted to cover the cables that usually lie along the center of the floor running back to the engine bay. Daniel came up with a rather unique design that features an aluminum hand-fabricated cover with dimpled holes for strength and aesthetics that matched the navigator footboard in the passenger footwell.
During that time, I connected with Magnus Walker and his work in creating unique 911s. One of the features of his cars is to drill the stock ‘70s door handles. Because we were building a road-car replica, the doors where going to have period-correct door handles and I asked Daniel if we could do an homage to Magnus by drilling the interior door handles.
Daniel experimented with how to achieve this look on the admittedly thin handles. The result seen in the car today demonstrates Daniel’s attention to detail and craftsmanship. I know it’s a small thing, but this car was all about getting details right as it was being built.
Early on I was doing research to find out how road-going Spyder interiors looked (as often this was the first thing to go when these cars were new). My research led to Ralph Lauren, specifically his faithfully restored chassis No. 5500061. This interior was used for reference as we spec'd the interior.
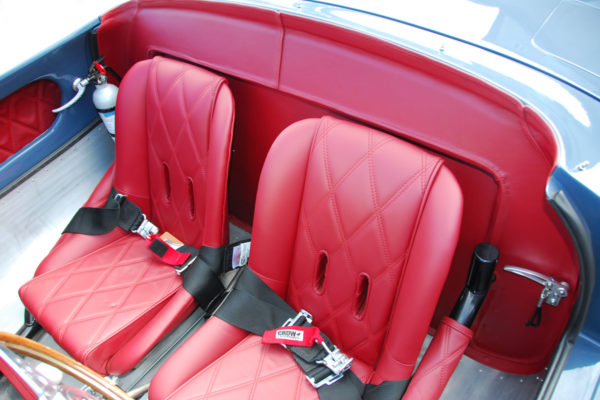
Early on I chose to do the entire interior in leather and Daniel sourced two Rolls Royce red-leather hides to fully cover the seats (front and back), the entire rear firewall, and even the “scuff drip” that runs along the top of the footwell bulkhead. The only things I chose not to do were the thin door-top upholstery strips and footwell upholstered panels (that would normally cover the raw aluminum bulkheads below the slender doors).
In the case of SM 0003, I asked Daniel to skin the curved floor between the seat and the door in aluminum to match the full aluminum floor in the car. Daniel took this a step further and put in rivets along the floors and these side panels which I think is a fabulous detail (again, small but important). The seats have a diamond stitch pattern that offsets the breather holes in the seat backs, all finished in red leather.
One other thing was to source original Autopulse 500 electric fuel pumps to be installed in the lefthand side of the drivers footwell, the same location as fitted in original cars back in the day. Two of these were used in the cars fitted with the Fuhrmann 4-cam Carrera engine in order to deliver enough fuel to the motor. After a long search, I sourced a few correct unrestored 500 pumps. I sent two of the best to Daniel who gave them an authentic refinish.
This resurfacing was only half the problem, as the fuel rails that linked the two pumps together are made of “unobtainium”. Again, Daniel’s craftsmanship and attention to detail rescued us, as he went through several iterations casting replica fuel rails until he had the results that he wanted, and then fitted these fuel rails with correct banjo bolt caps. The end result is another detail in the car that is just fabulous.
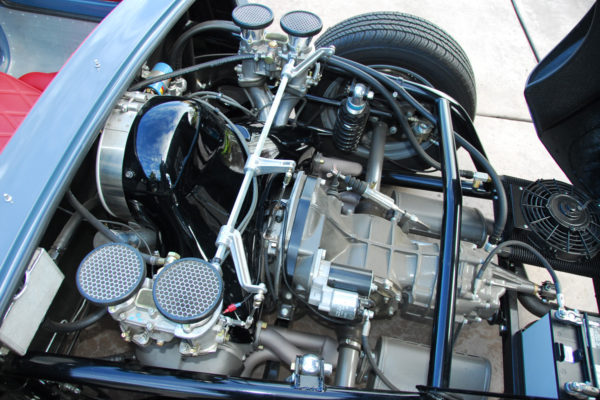
I worked with my friend (the aforementioned VW collector and oracle of all things Type 1) on the specification for the motor. The one thing we found was that the originally spec’d 44 Weber carbs were on back order. Up to this point, my friend had been pushing me to go with 48IDA race carbs and so I had the engine built with original Weber 48 IDAs setup and tuned for street use by the engine builder, Blackline Racing in Utah.
Daniel was concerned about clearance and potential carb backfires, so he fitted aluminum plates (with decorative rivets matching the interior) to the underside of the engine cover. Again, another small perfect detail on the car. The reality is the carbs were tuned when the engine was built and dyno’d so the motor runs as it should. We sourced some nice stack air cleaners that finish off the velocity stacks, while also providing some level of protection from debris entering the carbs. Ultimately this was a great decision—nothing like wide-open 48IDAs at full chat right behind your head!
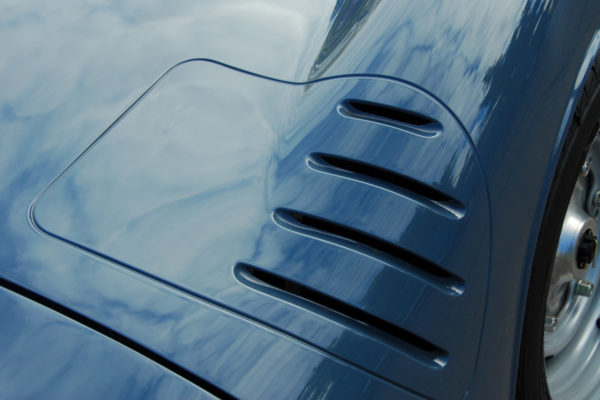
Since we’re talking about the engine cover, Daniel knew my design strategy for the car so he hand-cut the engine-cover fender vents (which are normal purely cosmetic) before the body went into prep and paint so these would be functional.
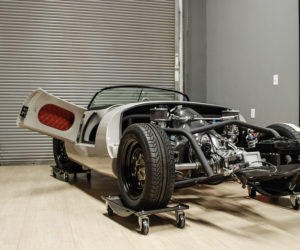
One thing that Daniel does with his cars is to have them finished to a high standard. Fiberglass is extremely hard to get straight and prepped for paint. Daniel oversaw the entire process, resulting in exceptionally even panel gaps and straight panels all the way around the car.
Given all the 550 replicas I had seen, almost all of them had cosmetic body features that were lacking. For example, the front oil cooler is often molded into the body (versus actually a separate bolted-on piece) and the brake-cooling duct openings were simply molded into the body and the back is painted black to emulate real ducts. I didn’t want that for this build.
This is one of the reasons I chose to work with Daniel as his cars are built with functional brake-cooling ducts and attached oil cooler grille at the base of the nose. Daniel and I initially discussed making this a functional location for the oil cooler, but he explained it would be somewhat less efficient than the oil cooler he specs, so we stayed the course.
Normally you’ll see the gas tanks fitted in replicas are merely painted black or covered in whatever the builder sprays the trunk interior with (normally simply undercoating). In the case of my car, I wanted the tank to be painted with an aluminum-look finish. To do this Daniel had the tank professionally finished (versus the raw manufactured state they normally are left in) and then finished in an aluminum paint finish.
As the car came together, and given I wanted as authentic a reproduction as I could have done, I continued researching the real details of these cars, incorporating little changes along the way. (Even down to assembling a period-correct tool kit for the car and having a set of aluminum drum covers drilled to emulate what was done on the original 550 brake drums back in the day). I also had Daniel remove the hub cap clips, as I didn’t want to see them on the wheels (this element just felt odd given that I wasn’t going to run hub caps).
The final product drives extremely well and recently took First in class at our local Concours de Elegance. More important, though, is the fact that I now have a period-correct Spyder reproduction that faithfully follows just about every original detail that matters.






Comments for: WEB SLINGER
comments powered by Disqus